|
PP4SS Exhibits
The Diffusion Cloud Chamber |
||||||||||||||||||||||||||
 Our 'rat tank' diffusion cloud chamber... |
||||||||||||||||||||||||||
|
|
||||||||||||||||||||||||||
|
How it works
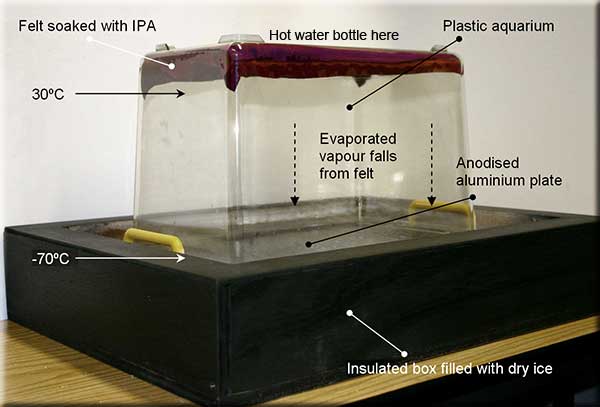
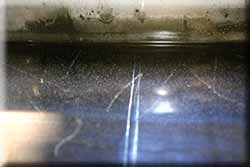
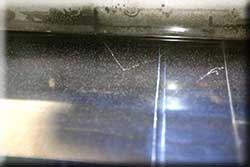
When a charged particle passes through a supersaturated gas, a series of droplets marking the path of the particle condenses out of the vapour, as the particle ionises atoms along the track. These tracks are momentarily visible, marking the path of the particle through the detector. Traditional cloud chambers operate by quickly reducing the pressure of a vapour, such that it enters the supersaturated state, taking photographs of any tracks formed, increasing the pressure once more to remove the tracks (the droplets become gaseous once more), and repeating the cycle, each time taking photographs of any visible tracks. The diffusion cloud chamber works in a slightly different way, avoiding the need for expensive, pressure-driven apparatus. It involves the creation of a thermal gradient (see the diagram above), through which a volatile compound descends, reaching a point in the gradient where a supersaturated layer can form, through which particle tracks can be seen. Building a home-made chamber [Note: if you're interested in learning more about how to build your own cloud chamber, we have more detailed instructions, including a list of do's, don't's and watch-out's. Click here to email Alan Walker of the Physics department.] (Consult the photograph above as you read the following section.) We've used an upturned plastic aquarium tank for our home-built chamber, into the top of which is stuck a piece of felt, which can be soaked in isopropyl alcohol, a light, highly volatile fluid. The base of the tank rests on a thick sheet of anodised aluminium, which gives a good contact area with a reservoir of dry ice, contained in an insulated box. Using this we can reach temperatures below –70°C. By placing a hot-water bottle on top of the tank, we're able to get gradients of almost 100°C between the top and bottom surfaces. The supersaturated layer forms a few cm above the base plate, and it's in this thin region that the tracks form. Because the vapour is continually sinking, the tracks vanish quickly, but they can be easily seen, and photographed. Some results Click on the thumbnails below to see a couple of images of tracks (with brief descriptions), photographed in the prototype chamber described above. One problem, of course, is that there's only a probability of generating tracks, each time the chamber is made ready: sometimes there are no events, and taking a photograph on each cycle can be wasteful. Indeed, it's been said that operating a cloud chamber in this way is like going on holiday blindfolded and waving your camera around, taking random pictures, in the hope that some of them will show an interesting image... One way to improve the odds, of course, is to combine the cloud chamber with a coincidence detector (such as the hodoscope, mentioned previously, or two Geiger Müller tubes). If the chamber is placed between two detectors, we can arrange to trigger a photograph of the saturated region only when a coincident event occurs (when a charged particle has passed between the detectors, and hence through the chamber). This exhibit (and the previous hodoscope) lead naturally on to the muon lifetime experiment.
|
||||||||||||||||||||||||||
|


