|
||||||||||||||||||||||||||
|
||||||||||||||||||||||||||
|
PP4SS Exhibits
The e/m Apparatus |
||||||||||||||||||||||||||
|
|
||||||||||||||||||||||||||
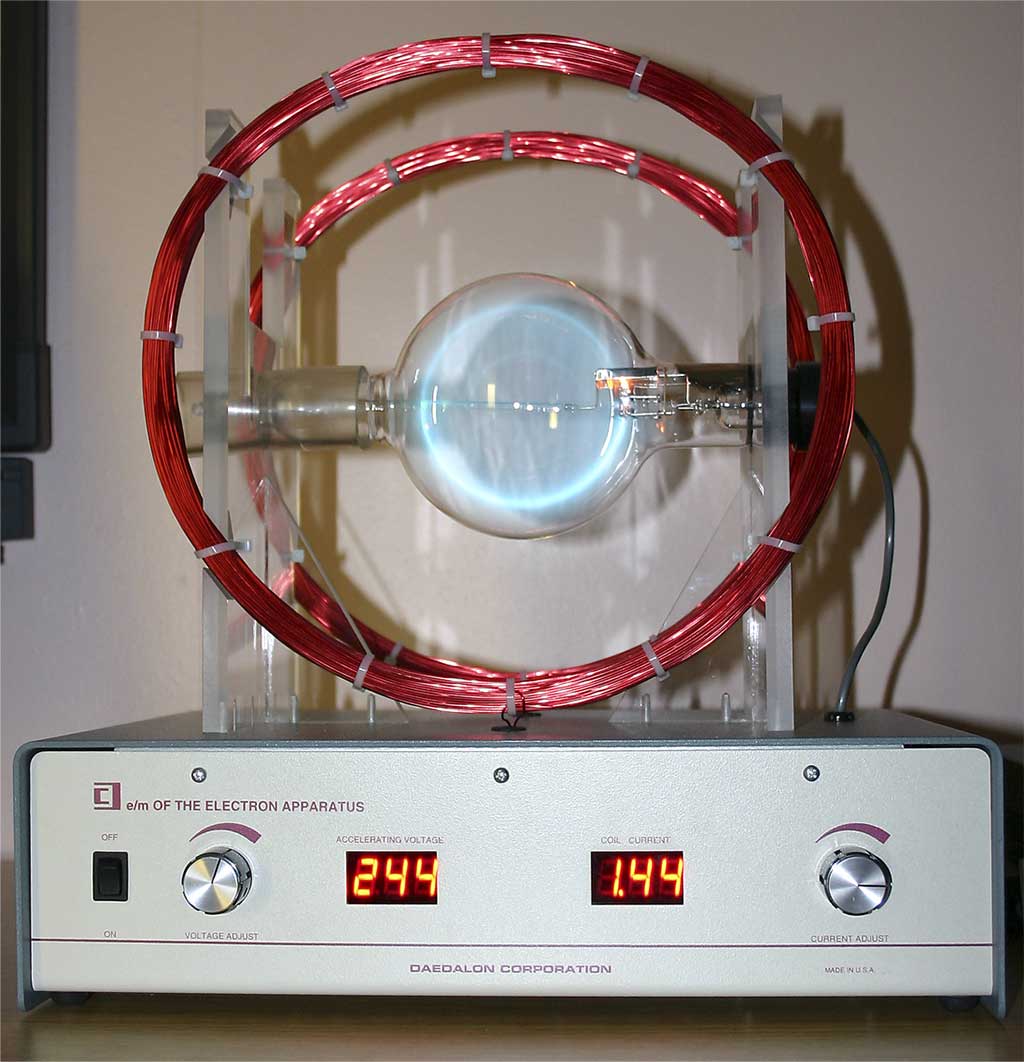
| The e/m Apparatus (above), so named because it lets users calculate the charge-to-mass ratio of the electron, follows on from the first exhibit, and starts to provide some quantatative experimental work (the monitor and magnets giving a qualititive feel for the principles involved.) The e/m kit does, however, also illustrate some more of the important points which need to be understood before the pupils move on to driving the LEP/LHC simulator.
The similarities between this and the previous exhibit make it clear what the kit does. First, the partially-evacuated sperical tube, with its off-centre electron gun, is analogous to the CRT. And second, once the pupils understand the field distribution of the toroidal magnet (and when they work out what happens when it's placed flat onto the screen), the Helmholtz coils above can be described as a partial analogy, with a perpendicular (and flat) magnetic field being generated within the plane of the electron beam. The kit is simple to operate: two dials control the accelerating voltage for the electron beam and the current through the coils (and hence the strength of the magnetic field bending the path of the electrons). As can be seen in the double-exposure image above, the beam – which at zero current is simply a straight line pointing downwards on the right of the tube – can be bent to form a circular path, if the current is high enough. Carrying out calculations There are several ways in which the pupils can carry out experiments on the tube, depending on their level of ability. First, there are the numerical measurements which can be made – the measured levels of current, voltage and the diameter of the beam circle – to work out the charge/mass ratio for the electron. A simple (and provisional) worksheet (in Word format), used to take pupils through these steps, can be downloaded by clicking here. The equations which are necessary to calculate the ratio can be given in advance, and more able pupils can then combine the simpler equations into the final one into which the three values above can be inserted. (Error calculations are also possible here.) Finally, there are other issues which can be discussed, for non-numerical analysis. Why, for example, would the measurements be affected by the position of the apparatus? Or the location of the classroom on the Earth's surface? Introducing the next exhibit A useful game can also be played, which illustrates (at least in rudimentary form) one of the important points behind the LHC accelerator. The operator of the e/m kit is first asked to create an electron beam at fairly low voltage which has a diameter of, say, eight centimetres. (A phosphorescent ruler is placed in the tube horizontally in the path of the beam, and the intersection point of the circle is illuminated on the ruled line.) Next, the user is challenged to simultaneously increase the voltage (and hence the initial acceleration of the electron beam), while maintaining the same circle diameter, which means that the current (and magnetic field) has to be increased at the same time. Having done this, pupils appreciate better the way in which the real accelerators such as LHC have to synchronously increase the magnetic field to hold the particle beams within the narrow vacuum tube, as they are boosted in energy (and speeded up). (Of course, the mechanisms are different, and the e/m kit only provides some initial acceleration for the beams, but the principle is useful to understand.) |
||||||||||||||||||||||||||
|